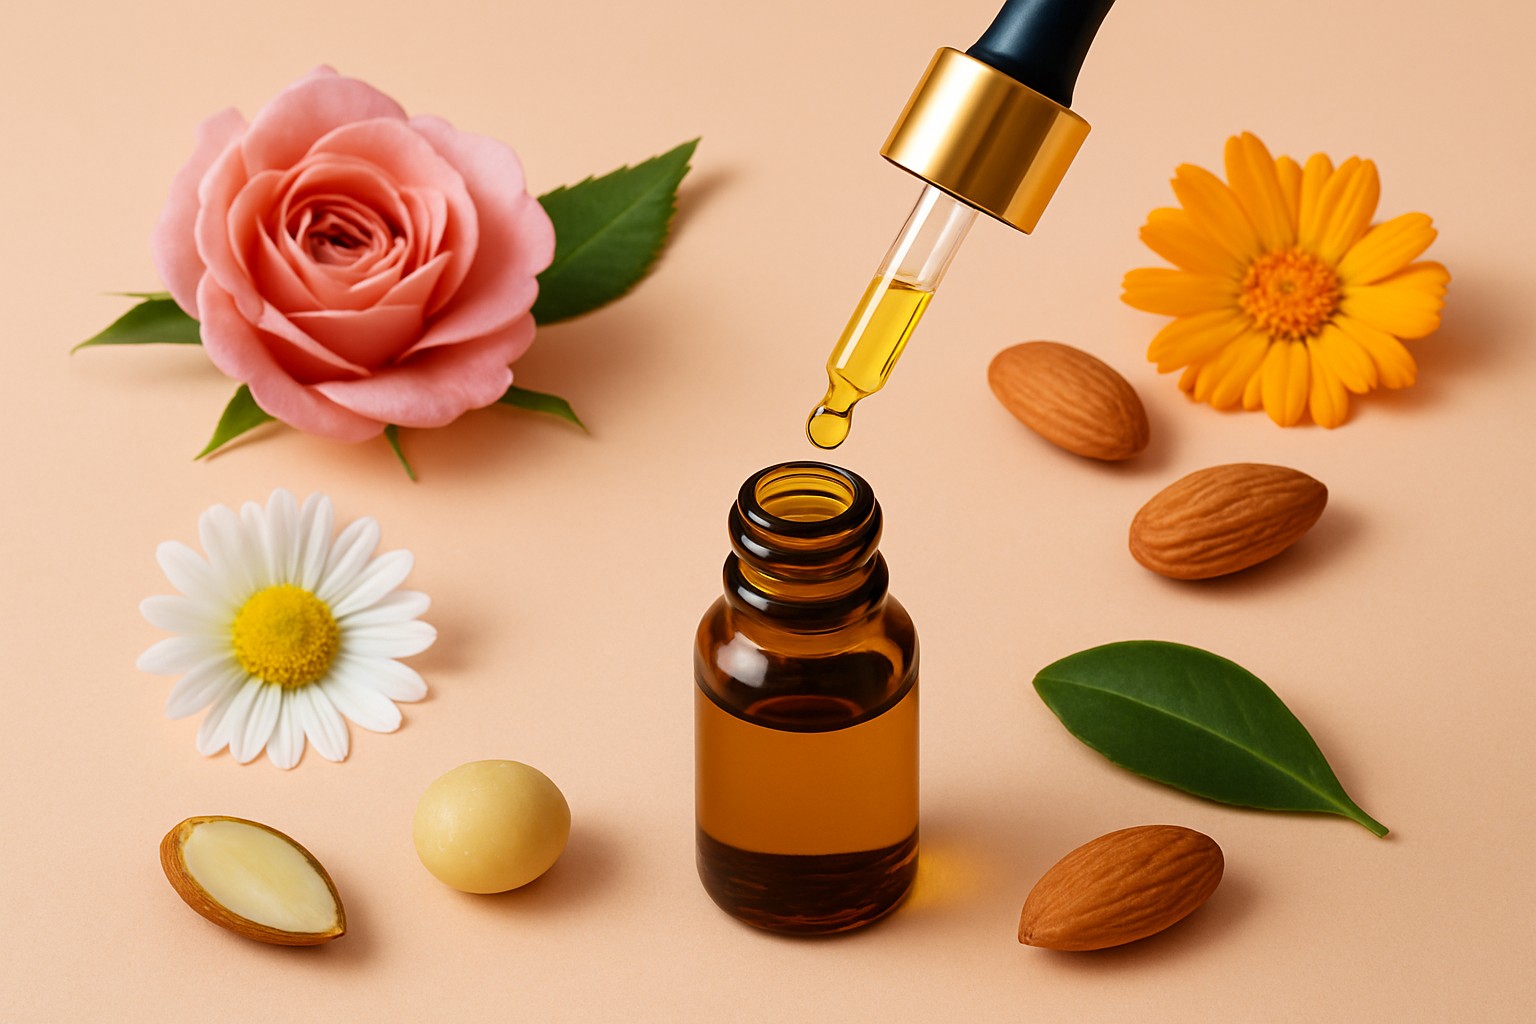
Facial oils have made a bit of a comeback lately and it’s easy to see why—they offer nourishing and hydrating perks that many skin routines can benefit from. Whipping up your own DIY facial oil is a neat way to personalize the mix to exactly what your skin craves while dodging pesky additives or irritants that often sneak into store-bought options.
Getting to Know Your Skin Type (Because One Size Definitely Does not Fit All)
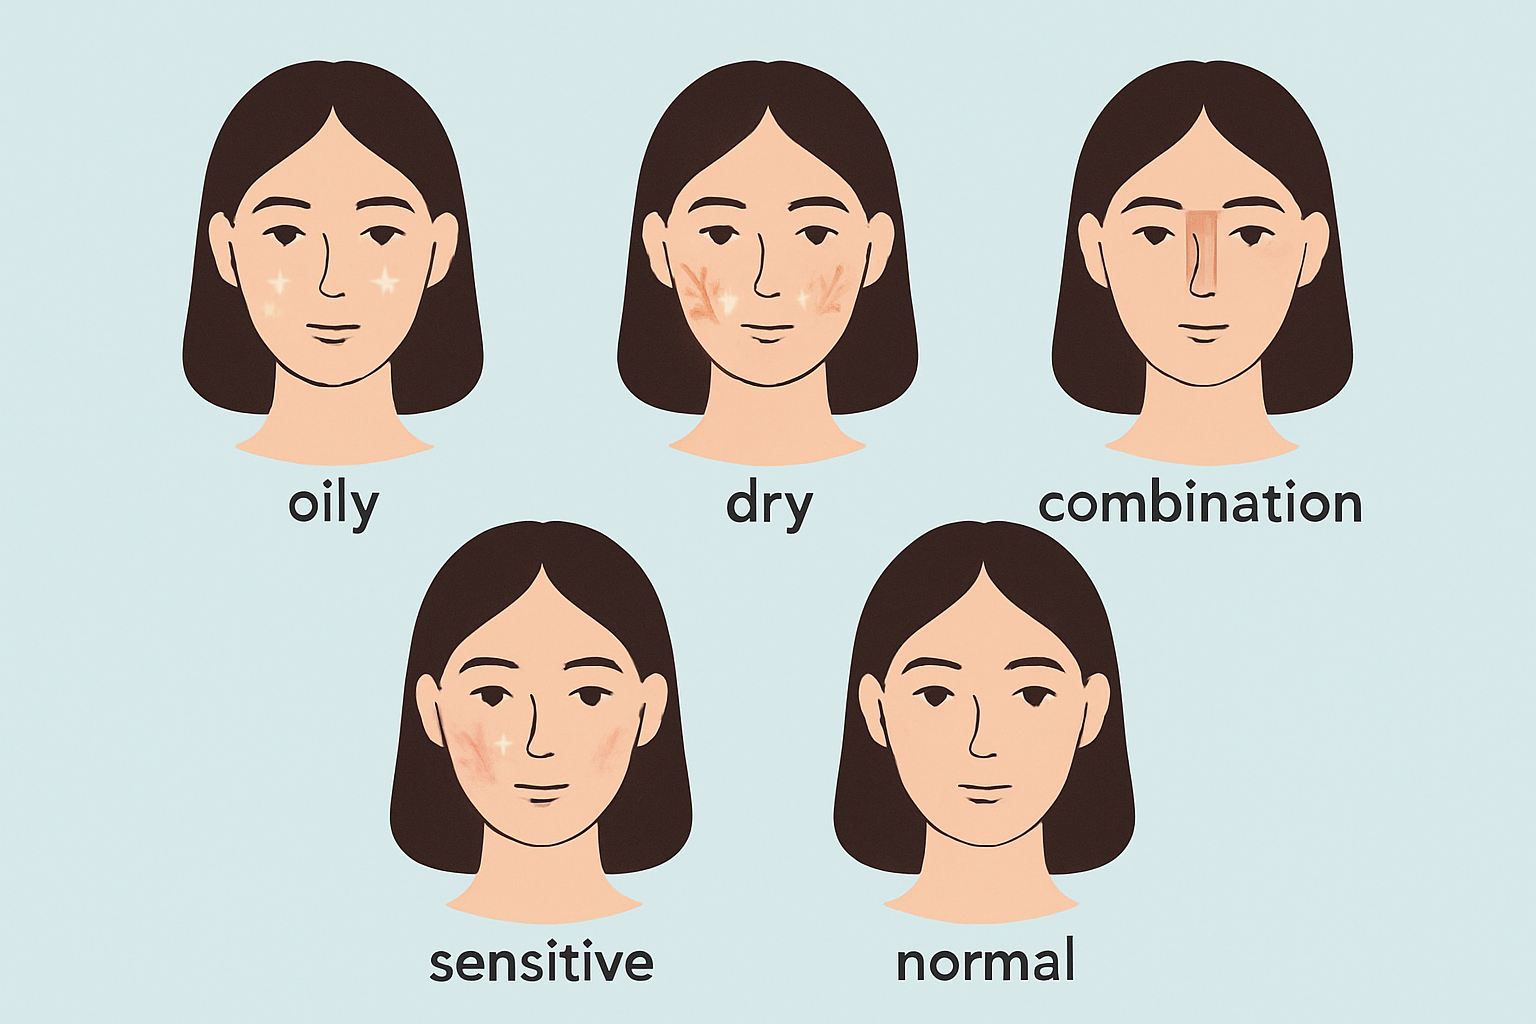
Understanding your skin type is key when picking the right oils. Skin falls into five categories: oily, dry, combination, sensitive and normal. Each type has its own personality and influences how oils interact with your skin. What deeply nourishes dry skin might clog pores on oily skin.
Oily skin: Often churns out extra sebum leading to a shiny glow and occasional breakouts—annoying but manageable. It typically works well with lightweight non-comedogenic oils that keep oil production in check without weighing things down.
Dry skin: Usually feels tight or flaky. Rich moisturizing oils restore hydration and give the skin barrier the TLC it needs.
Combination skin: Has an oily T-zone with dry patches elsewhere—a mixed bag. Using a blend of balancing and hydrating oils is the best way to keep everything playing nicely.
Sensitive skin: Easily irritated, showing redness or dryness quickly. This skin type thrives on gentle oils with calming, anti-inflammatory perks.
Normal skin: The lucky one—balanced with minimal oiliness or dryness. It responds well to versatile oils that preserve its natural glow and skin health without fuss.
Visual guide to common skin types highlighting their unique traits and needs
Key Ingredients for DIY Facial Oils Carrier Oils and Essential Oils You Cannot Overlook
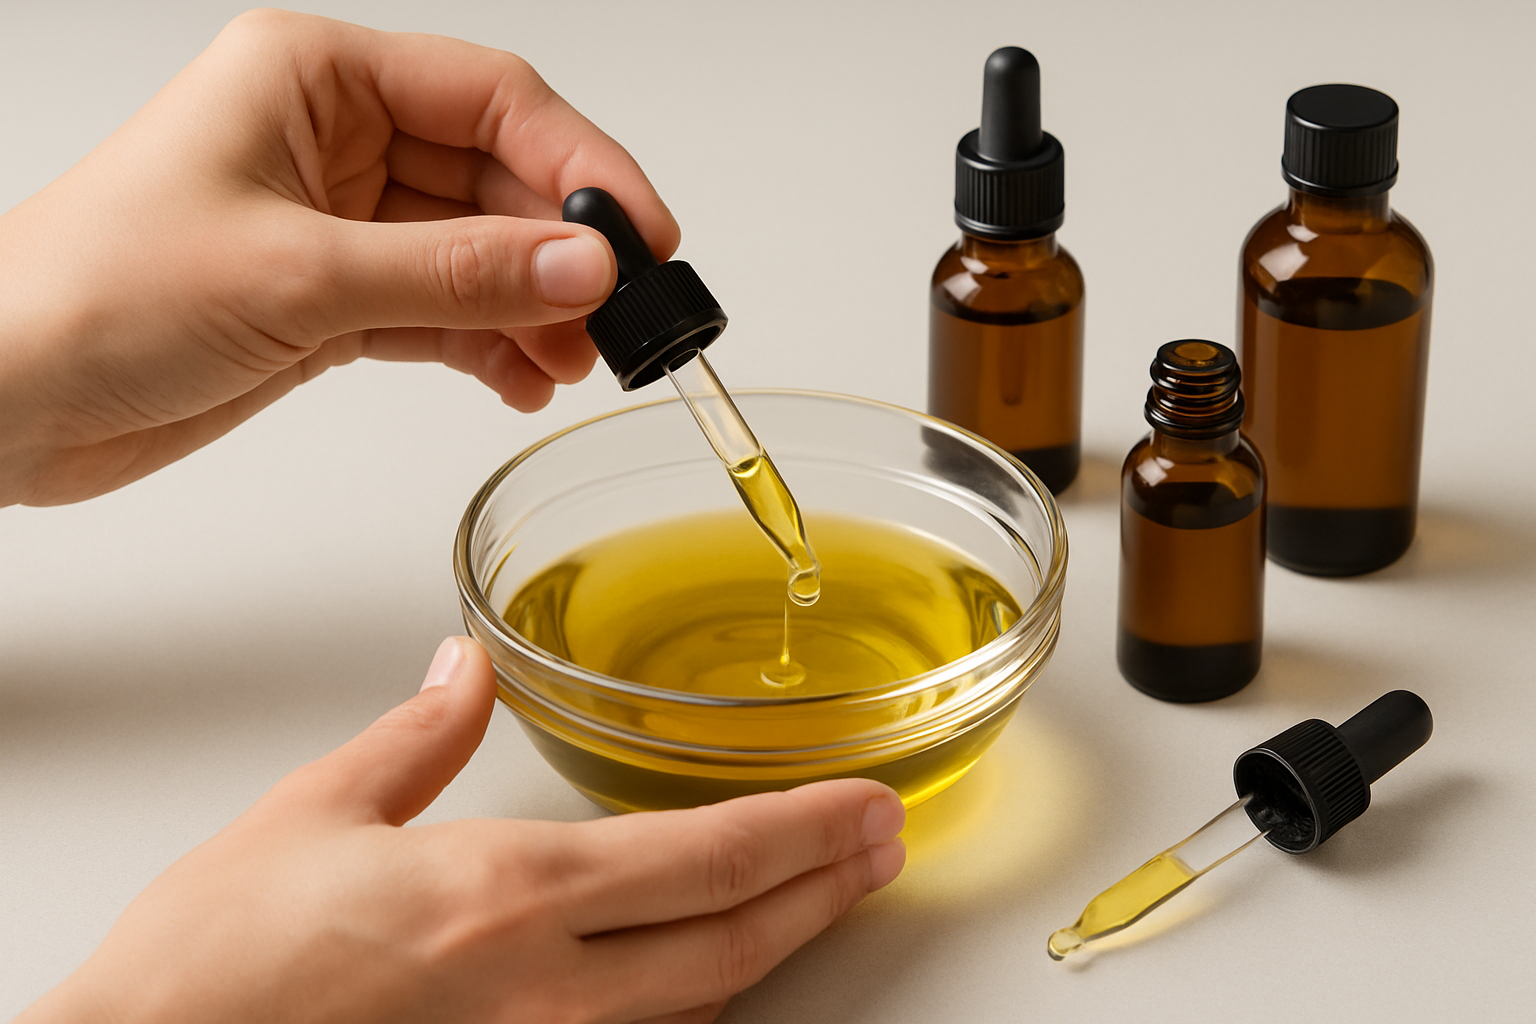
DIY facial oils mix carrier oils with essential oils to create something truly special for your skin. Think of carrier oils as the trusty foundation that nourish and hydrate while often packing a punch of antioxidants. Meanwhile, essential oils are potent powerhouses that calm inflammation, fight bacteria, or help healing.
Carrier Oil
Best For Skin Type
Benefits
Best Use Case
Jojoba Oil
Suitable for all skin types, especially oily skin
Helps keep oil production in check without clogging pores—think of it as a balancing act your skin will thank you for
Ideal as a daily facial oil, especially for oily and combination skin
Argan Oil
Best for dry and normal skin
Loaded with vitamin E, this deeply moisturizing oil has some nice anti-aging perks too—you might say it’s like a spa day in a bottle
Great for hydrating those dry or mature skin patches
Rosehip Oil
Good for dry, sensitive, and aging skin
Packed with vitamin C and fatty acids that brighten your complexion—perfect for when your skin needs a little extra TLC
Often used for healing scars and doubling as a gentle anti-aging serum
Grapeseed Oil
Works well for oily and combination skin
Lightweight and antioxidant-rich, this one helps calm inflammation without weighing you down
Perfect as a light moisturizer when your oily skin needs a breather
Sweet Almond
Suitable for dry and sensitive skin
Nourishing and soothing, full of vitamins that your skin will quietly appreciate
Helpful for calming dry or irritated skin
Marula Oil
Ideal for dry and normal skin
Hydrating and packed with antioxidants, it soaks right in without leaving any greasy residue
Great for overnight nourishment or as a hydrating serum that feels like a gentle hug
Essential Oil
Benefits
Precautions
Suitable Skin Types
Lavender
Known to soothe irritated skin and bring it back into balance like a gentle sigh
Allergies are rare, but it’s always wise to do a quick patch test just to be safe
Sensitive, normal, dry
Tea Tree
Famous for its antibacterial magic and its knack for tackling acne head-on
Can be a bit harsh on sensitive skin if used straight up, so dilution is key
Oily, acne-prone
Frankincense
A friend to aging skin, it promotes cell renewal and gives a subtle boost to skin vitality
Best to skip it if you’re pregnant or nursing—better safe than sorry
All except sensitive
Geranium
Works wonders in balancing oil production while calming inflammation, a true multitasker
Some people might experience sensitivities, so patch testing is your best bet here
Combination, oily, dry
Chamomile
A classic go-to for calming redness and soothing inflammation, like a soft hug for your skin
Pretty safe overall, but allergies can pop up, so a little testing won’t hurt
Sensitive, dry
Ylang Ylang
Helps keep sebum in check and improves skin texture with a touch of floral flair
Use sparingly and steer clear if you’re prone to headaches—better not to gamble
Oily, combination
Essential oils are super concentrated so it’s really important to dilute them properly in carrier oils—usually somewhere between 0.5% and 2% concentration—to avoid any unwanted irritation or sensitivity.
Essential Tools and Supplies You will Want When Crafting Your Own Facial Oil
Accurate measuring spoons or small scales are your best friends when it comes to measuring oils with precision, helping you keep your blends consistent every single time.
Amber or cobalt blue glass bottles are perfect for storing facial oils since they do a great job shielding the contents from light damage, which can really spoil the goodness.
Droppers or pipettes provide a neat and hygienic way to apply oils with just the right amount of control—no messy spills here.
Small funnels come in handy for pouring oils smoothly, saving you from those frustrating drips and spills.
Labels and permanent markers are a simple but lifesaving combo for tracking ingredients and remembering exactly when you whipped up each batch.
Mixing bowls or glass cups give you the perfect space to blend oils thoroughly before transferring them to your bottles—trust me, skipping this step can make a noticeable difference.
A Friendly, No-Fuss Guide to Whipping Up Your Own Custom DIY Facial Oil
1
Get to know your skin type and pinpoint any pesky issues you want to tackle. This step really pays off when choosing the right ingredients.
2
Grab a carrier oil or better yet a blend that vibes well with your skin type—this will be your base.
3
Pick one to three essential oils that zero in on your specific concerns but be sure they’re gentle and skin-safe.
4
Measure out the carrier oils carefully and pour them into a mixing bowl or cup—precision counts but don’t stress.
5
Slowly add the essential oils drop by drop into the carrier oil, mixing softly like you’re coaxing them to blend.
6
Always do a patch test: dab a tiny bit behind your ear and wait 24 hours to make sure your skin gives a thumbs-up.
7
If all goes well, pour your concoction into an amber glass bottle, slap on a label with the date and ingredients and tuck it away somewhere cool and dark like a little skin-care secret stash.
Mixing carrier and essential oils to prepare a custom DIY facial oil blend
Simple DIY Facial Oil Recipes Crafted Just for Your Unique Skin Type
Here are some facial oil blends specially crafted for different skin types. Each recipe brings together a handpicked mix of carrier and essential oils aimed at tackling everyday skin concerns—whether you need a boost of hydration, a bit of balance, a calming touch or help keeping that shine in check.
Dry Skin: Whip together 2 tablespoons of argan oil, 1 tablespoon of rosehip oil and 3 drops of chamomile essential oil to give your skin a serious moisture boost and a calming hug.
Oily Skin: Blend 2 tablespoons of jojoba oil, 1 tablespoon of grapeseed oil and 4 drops of tea tree essential oil to help keep shine in check and those pesky blemishes at bay.
Sensitive Skin: Stir up 2 tablespoons of sweet almond oil, 1 tablespoon of rosehip oil and 3 drops of lavender essential oil to gently soothe any redness and calm irritation because your skin deserves a little TLC.
Combination Skin: Mix 1.5 tablespoons of jojoba oil, 1 tablespoon of argan oil and 3 drops of geranium essential oil for a nicely balanced hydration that nudges your skin toward a more even tone. No fuss, just good vibes.
Tips for Adding Your DIY Facial Oil to Your Skincare Routine (Because Your Skin Deserves a Little Extra TLC)
After you have finished cleansing and toning, go ahead and apply your facial oil either before or after moisturizer depending on what your skin seems to crave that day. Lighter oils usually play nice underneath creams, while the richer ones often shine when used as the final touch. You might find yourself tweaking the amount as the seasons change, slathering on a bit more in those bone-dry winter months and dialing it back when the air gets all muggy.
Common Mistakes Individuals Tend to Make When Dabbling with Facial Oils
Picking oils that don’t suit your skin type and can clog pores or leave your skin thirstier than before.
Skipping the vital patch test which increases the risk of allergic reactions or irritation.
Forgetting to stash your oils in a cool dark spot, which turns them rancid and robs them of their benefits.
Going overboard with facial oil and piling it on until your skin breaks out.
Ignoring expiration dates and holding onto old oils that might irritate your skin.
Frequently Asked Questions
How much does it typically cost to make a DIY facial oil?
The upfront price for carrier oils, essential oils and glass bottles usually falls between $30 and $60. Since you only need tiny amounts for each batch, the cost per bottle often ends up being just a few dollars. This is much more wallet-friendly than many high-end commercial facial oils. The best part is your initial stash of supplies can cover several batches so you’re really getting good value from your investment.
Can I use just one carrier oil, or do I need a blend?
You can definitely start with a single carrier oil especially if you’re new to making facial oils. Jojoba oil is a great all-rounder that works well for most skin types and offers versatility. However, blending oils lets you combine their benefits. For example, the light almost weightless feel of grapeseed pairs nicely with the richer texture of argan. While a single oil works fine, blends often add extra finesse.
My skin is acne-prone; are facial oils safe for me?
Yes, facial oils can be safe if you choose the right ones that won’t clog your pores. Lightweight oils like jojoba, grapeseed and rosehip are best if your skin tends to be oily or acne-prone because they may help balance sebum production without causing breakouts. It’s best to avoid heavy oils like coconut oil on your face. Many people find adding a bit of tea tree essential oil helpful due to its antibacterial properties.
How long will my homemade facial oil stay fresh?
If you store your DIY facial oil properly—in an amber or cobalt blue glass bottle kept somewhere cool and dark—it typically stays fresh for about 6 to 12 months. Keep in mind carrier oils can eventually go rancid. To extend shelf life, add a few drops of vitamin E oil as a natural preservative. Don’t forget to label your bottle with the date you made it. Your future self will thank you.
When in my skincare routine should I apply the facial oil?
You should apply facial oil after water-based products like serums and toners. It can go before or after your moisturizer depending on your preference. For a lighter feel, apply the oil first and then your cream. For a richer moisture experience, put the oil on last. A useful tip I’ve learned is to apply products from thinnest to thickest consistency which helps the routine flow better.