This guide walks you through installing a stunning herringbone tile pattern yourself. It covers everything from the initial planning to the final sealing.
Learn how to plan and mark a precise layout grid that keeps your herringbone pattern evenly balanced with no surprises along the way.
Follow a straightforward step-by-step process for cutting and placing tiles to nail the classic interlocking V shape every time.
Pick up practical troubleshooting tips for pesky issues like shifting tiles or uneven grout lines that tend to sneak up on you.
Find expert advice on sealing and caring for your tile so you can keep that fresh-from-installation look for years to come.
Herringbone tile known for its distinctive zigzag pattern effortlessly adds a timeless charm that instantly elevates any room. It’s become a go-to favorite for floors and backsplashes in renovations for good reason. Tackling the installation yourself not only trims down the budget.
Before you dive headfirst into your herringbone tile project, it’s a good idea to gather the essentials: a trusty tile cutter, a notched trowel, spacers, a level and some safety gear to keep things accident-free.
Getting to Know the Herringbone Pattern and How to Thoughtfully Plan Your Layout
The herringbone pattern showcases rectangular tiles arranged in a staggered zigzag layout that really adds a lively sense of motion to the design. A bit of careful planning is usually the secret sauce here to keep everything lined up just right and symmetrical.
Take careful measurements of your space so you know exactly how many tiles you’ll need and how they’ll fit together snugly.
Choose the tile orientation thoughtfully since laying them horizontally or vertically can change the room's vibe.
Pick a starting focal point, usually in the room’s center or by the door to create a balanced and inviting layout.
Factor in grout lines in your plan because they keep the spacing right and prevent gaps or overcrowded spots.
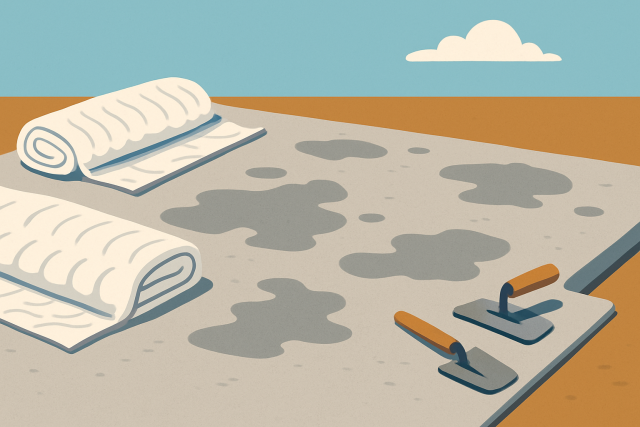
Grab a measuring tape and a level then draw a chalk line grid on your surface to create straight, perpendicular guides.
Marking a precise grid on the floor to guide herringbone tile placement.
A No-Nonsense Guide to Installing Herringbone Tile Yourself (Yes, You Can!)
1
Start by giving your surface a good once-over—clean off dust, grease and any stray bits of debris so the adhesive really has something to cling to.
2
Spread the tile adhesive or thin-set mortar evenly over a small area using a notched trowel to make sure it’s just right—not too thick or skimpy.
3
Place the first two tiles at a right angle to each other forming that classic V shape that anchors the entire pattern. It’s like laying the foundation for a perfectly choreographed dance.
4
Lay the tiles row by row. Take your time to get each piece to fit snugly so the herringbone design stays consistent and doesn’t go offbeat.
5
When you need to trim tiles along edges and corners, a tile cutter or wet saw will be your best friend for clean polished cuts that look professional.
6
Keep checking your alignment often—grab a level and some spacers to ensure those grout lines stay evenly spaced and the whole pattern looks sharp and uniform.
7
Let the adhesive cure fully. This bit requires some patience, usually 24 to 48 hours depending on the product and conditions, but it’s worth the wait.
8
Finally, spread grout between the tiles with a rubber float, then wipe away any excess with a damp sponge to reveal those clean, crisp joints that really make your handiwork shine.
When cutting tiles it’s worth taking your time and measuring twice before you make the cut. This can save you from a lot of wasted material later on. A tile cutter is a reliable tool for nice straight cuts. For angled or more intricate shapes a wet saw is the best choice to get the job done properly. Make sure to wear safety gear like goggles and gloves. It’s not just about looking the part but about protecting your fingers. Smooth clean cuts usually mean you will need less filler grout which is always a bonus. Some common mistakes I’ve seen are rushing through the cuts or ignoring tile orientation. Both can mess up your entire pattern.
Accurately cutting tiles with an electric tile cutter for perfect edge fitting.
Troubleshooting Typical Issues When Installing Herringbone Tile (Because Sometimes Even the Best Laid Plans Go Sideways)
Uneven surfaces can really throw off your tile alignment. Using a leveling compound to smooth out bumps and dips makes a big difference.
If you notice tiles shifting or grout lines not matching up, don’t stress. Carefully lift and reposition them before the adhesive sets.
Cutting tiles near walls or corners is no time for guessing. Always take precise measurements and dry fit your tiles to avoid surprises.
To keep adhesive from spilling over edges, use thin layers with a notched trowel and quickly wipe away excess before it dries. This saves a lot of headache later.
Grout haze can be a pesky problem so rinse your tiles as soon as you are done grouting. If it sticks around, a grout haze remover usually does the trick.
Mistakes in tile placement happen more often than you would think but thankfully they’re usually fixable without tearing everything apart or starting over. The trick is to act fast before the adhesive sets. Just gently lift and nudge the tiles back into place. When it comes to those pesky little grout issues I’ve found that specialized cleaners usually come through like champs.
Final Steps and Maintenance Tips to Keep Your Herringbone Tile Looking Fresh and Fabulous
Applying a grout sealer soon after installation is a smart move to guard against stains and moisture, helping your tiles stay fresh and sharp for quite a while. It is worth taking the time to pick a solid, high-quality sealer and carefully follow the manufacturer's instructions.
Regularly clean herringbone tiles using a soft mop or cloth along with a mild detergent mixed into warm water. Use a gentle approach that these tiles deserve.
Definitely steer clear of harsh cleaners like bleach or ammonia because they tend to damage both the grout and the tile surfaces. Trust me, that’s a headache you don’t want.
Take care of any chips or cracks as soon as you spot them by using tile repair kits. Leaving them alone only invites bigger trouble down the line.
Make it a habit to reapply grout sealer every 1 to 2 years. This not only keeps your tiles water-resistant but also does a solid job at fending off stubborn stains.
Taking good care of your herringbone tile does more than just keep it looking sharp—it actually helps you steer clear of costly repairs down the line. By sticking to a regular cleaning routine and sealing the grout whenever it calls for it, you keep those tiles shining bright and the grout holding strong.
Passionate by sustainable living, this environmental journalist bridges the gap between complex ecological research and practical everyday solutions for modern households.