Painting plastic outdoor furniture is a wallet-friendly and creative way to breathe new life into pieces looking tired or sun-bleached. Whether your plastic chairs, tables or loungers have seen storms or you want a fresh pop of color, a good paint job can shield and spruce them up. Painting plastic isn’t like painting wood or metal—it calls for special tricks and the right materials to make sure the finish sticks and handles the outdoors. This thorough guide takes you through every detail: starting with a deep clean and proper prep, helping you pick the right paint, and finally showing how to apply it with a gentle touch.
Most plastic outdoor furniture is crafted from polypropylene, polyethylene or resin blends. These materials sport smooth non-porous surfaces that usually don’t give paint much of a chance to stick. Unlike wood or metal plastic tends to shrug off liquids so you really need to clean and prep those surfaces thoroughly.
Gathering Your Supplies and Choosing the Perfect Paint
It saves a lot of headaches down the line. You will want essentials like good surface cleaners, fine-grit sandpaper, primers made specifically for plastic and paint formulated for plastic surfaces. Of course, protective gear such as gloves and masks will keep things safe and tidy. Setting up your workspace with drop cloths and painter's tape is a little extra effort that really pays off by cutting down on mess and helping you nail crisp edges.
Kick things off with a heavy-duty cleaner or some good old trisodium phosphate to remove dirt and oils and stubborn mildew on your plastic surfaces.
Grab some fine-grit sandpaper to gently rough up the plastic just enough to help things stick without causing scratches.
Apply a bonding primer designed specifically for plastic. This step is essential for making your paint last.
Use a high-quality spray paint made for plastic to achieve a smooth and even finish that looks professional.
For tricky spots or textured areas brush on some acrylic latex paint. It works great for detailed work.
Wear nitrile gloves and a respirator mask while prepping and painting to protect your skin and lungs.
Finally, lay down drop cloths to keep your space clean and use painter's tape to create sharp and clean edges.
When choosing paint, it’s smart to go for brands that specifically say they work well with plastic and can handle outdoor conditions. Products like Krylon Fusion for Plastic or Rust-Oleum Specialty Plastic Spray Paint have earned their stripes because their flexible formulas effectively prevent cracks and fading. These paints don’t just sit on the surface. They bond chemically and mechanically to the plastic, which helps your color stay vibrant even when the sun and weather try to wear it down.
How to Get Plastic Furniture Ready for Painting (Without Losing Your Mind)
Proper preparation is absolutely key when you are aiming for a paint finish that really lasts on plastic outdoor furniture. It all starts with giving the surface a good scrub to banish any dirt or grease lurking around, then gently sanding it to create just enough texture for the paint to grab onto. After that, applying the right primer becomes your best friend in helping the paint stick like a charm.
1
Sweep away any loose dirt, leaves or debris from the furniture using a brush or a trusty vacuum cleaner. Getting rid of the obvious mess always makes the next steps easier.
2
Give the whole surface a thorough cleaning with warm water and a strong degreasing soap or TSP solution because this helps banish oils and residues that can prevent paint from sticking.
3
Rinse everything well then let the furniture air dry completely in a shady, dust-free spot. Patience here pays off big time.
4
Once dry, lightly sand all surfaces with fine-grit sandpaper. Focus on the smooth glossy areas so the paint has something to cling to. Think of it as giving your furniture a gentle rough-up.
5
Wipe down the entire piece with a damp cloth or tack cloth to sweep away sanding dust because who wants to paint over dirt?
6
Apply a thin, even coat of plastic bonding primer and be sure to let it dry according to the manufacturer’s instructions before you grab your paintbrush. Rushing this part rarely ends well.
Try to avoid harsh abrasives or aggressive sanding because they can easily gouge or damage the plastic surface. This is a common mistake I have seen more times than I would like. After sanding, make sure to wipe away all residue since any leftover dust or oils can cause the paint to flake off later. A useful trick is to run your hand over the surface. You want to feel a slight texture, not something slick or slippery.
How to Paint Plastic Outdoor Furniture Without Losing Your Mind
Getting the primer and paint just right is important if you want that smooth even finish we all dream of. When it comes to plastic furniture, spray painting is usually the trusty favorite because it hugs those tricky curves and shapes. Brush painting tends to shine when you’re tackling detailed nooks or textured plastic surfaces that need more TLC. Ideally, work when the weather is on your side because extreme heat, cold or humidity can interfere with drying and cause bubbling or uneven patches no one wants. With spray paint, take it slow and steady. Think of it more like a gentle dance than a sprint.
Apply primer in thin even coats and give each layer enough time to dry as recommended. Patience really pays off when building a solid base.
When spray painting keep strokes smooth and steady holding the can about 10-12 inches from the surface to avoid drips that can ruin your work.
Wait at least 15-30 minutes between spray coats depending on the product’s instructions and weather.
For brushing pick soft synthetic brushes and use gentle strokes to avoid brush marks.
Aim to paint when temperatures are between 50°F and 85°F and humidity is low. The paint will thank you during curing.
Don’t forget to move or rotate furniture pieces as needed so you can reach every nook and cranny without turning into a contortionist.
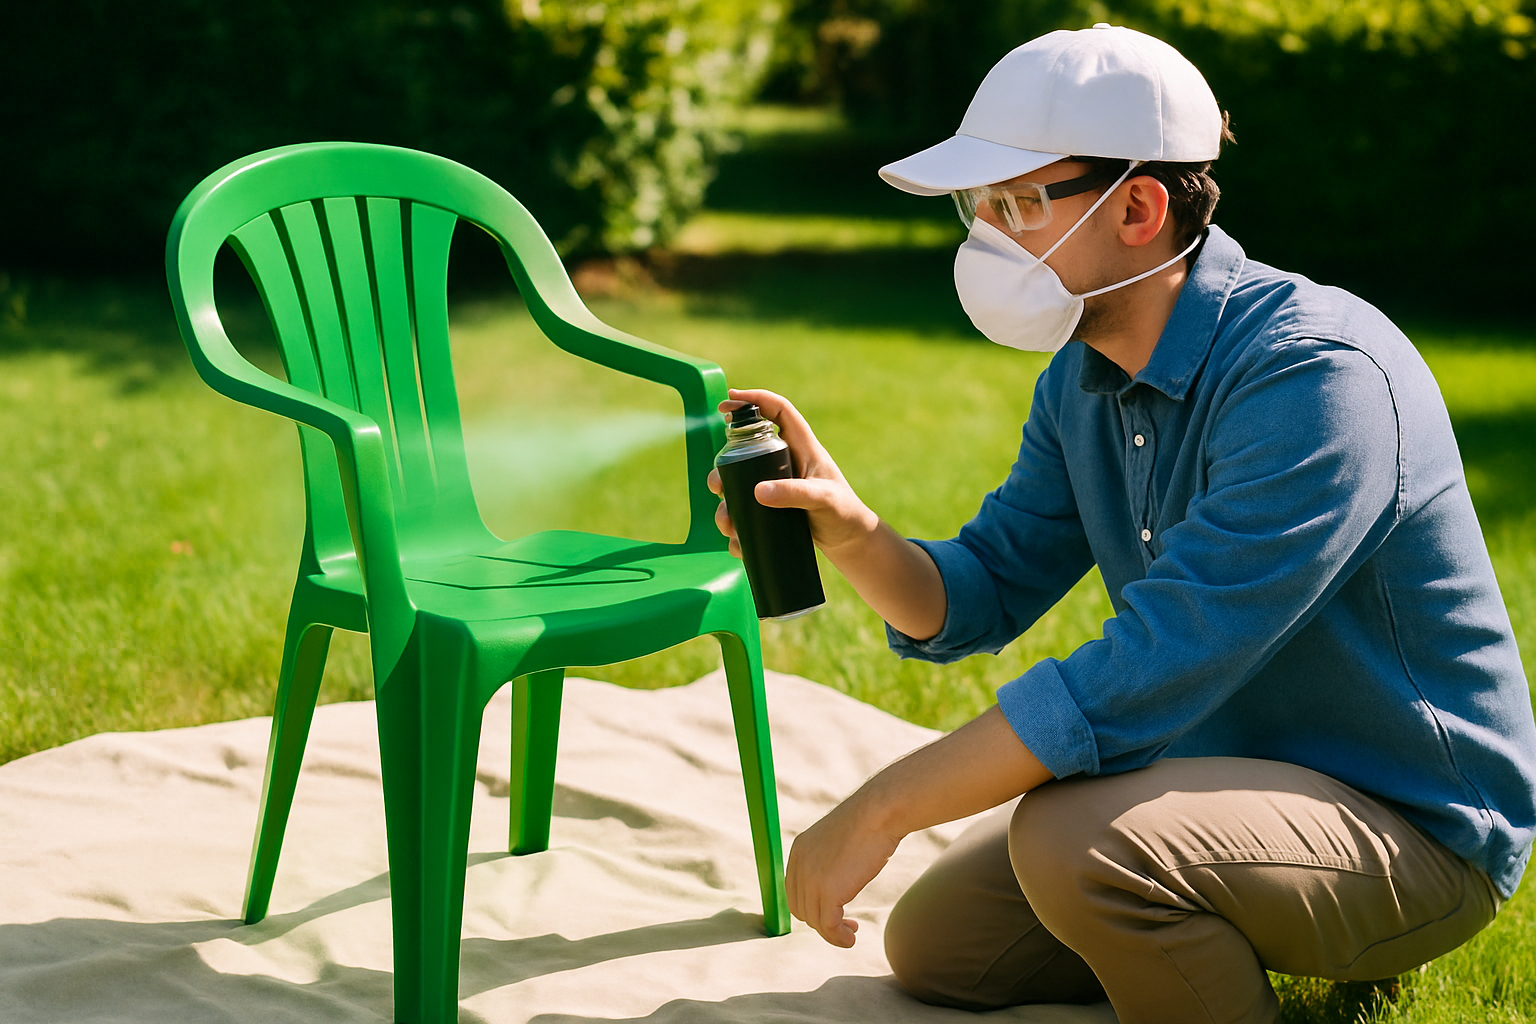
Applying spray paint evenly on plastic outdoor furniture with protective gear and proper setup
Slapping on 2 to 3 coats of paint does the trick for good coverage and durability. The drying time between coats can vary from 30 minutes to an hour depending on the room's mood and the specific paint brand. If you notice bubbling or peeling or flaking, it usually means the surface wasn’t prepped properly or the paint didn’t fully dry. Sanding those spots gently and giving them a good clean before repainting usually sorts things out.
How to Finish and Care for Your Painted Furniture (Because Your Hard Work Deserves It)
Once the final layer of paint has dried—no ifs ands or buts—applying a clear sealant can boost your weather resistance and protect your furniture from UV fading and daily wear. Choosing the right sealant and following the suggested curing routine usually keeps your pieces looking fresh much longer than you would expect.
Opt for a clear polyurethane or acrylic sealant that is rated for outdoor use and works well with your paint.
Give your paint at least 24 to 48 hours to cure before applying the sealant.
When cleaning painted surfaces be gentle. Use mild soap and water with a soft cloth or sponge to avoid scratches.
To help your furniture withstand the elements, store it under a cover or bring it indoors during bad weather. Your paint will appreciate it.
Keep some leftover paint nearby for chips or scratches. A quick touch-up helps prevent peeling.
Plan to reapply the sealant every year or whenever your furniture shows signs of wear. This depends on how much sun, rain or rough use it experiences.
Keep an eye on your painting plastic outdoor furniture now and then for any signs the paint might be failing like fading colors, cracking or peeling layers. Tackling these annoyances early with a quick touch-up can save you from bigger repairs down the line. If the peeling gets out of hand or the damage looks serious, you will want to roll up your sleeves and prep the surface again before applying a fresh coat.
Driven by a passion for culinary history, this food writer explores how ancient cooking techniques and forgotten ingredients can revolutionize modern home kitchens.