Fancy decorated cookies add a sprinkle of charm and a dash of elegance to any party or gift. Whether you’re marking birthdays or holidays or celebrating special moments that deserve extra, learning how to make them is surprisingly fun and totally doable.
Getting to Know Fancy Decorated Cookies The Lowdown on Different Types and How They are Made
Fancy decorated cookies show up in a handful of popular styles like royal icing cookies with smooth shiny finishes that almost sparkle. Fondant-covered treats have soft flexible layers that feel like a little pillow for your taste buds. Airbrushed designs wow with bright gradual color blends. The usual decorating tricks of the trade include piping, flooding, marbling, stenciling and hand-painting—each adding its own flair and intricate details to these delightful edible canvases.
Royal icing cookies feature a smooth glossy finish ideal for intricate piped designs that create a striking effect.
Fondant-topped cookies offer a soft moldable surface perfect for crafting detailed 3D decorations that stand out.
Airbrushed designs deliver eye-catching gradients and customized color effects that add subtle drama.
Basic decorating techniques include outlining, flooding, wet-on-wet methods and layering, each with distinct characteristics to master.
Popular themes focus on festive occasions such as Christmas and Halloween as well as weddings and baby showers where cookie art is especially prominent.
Techniques like stenciling, marbling and dusting with edible glitter provide delicate textures and an elegant sparkle that attract attention.
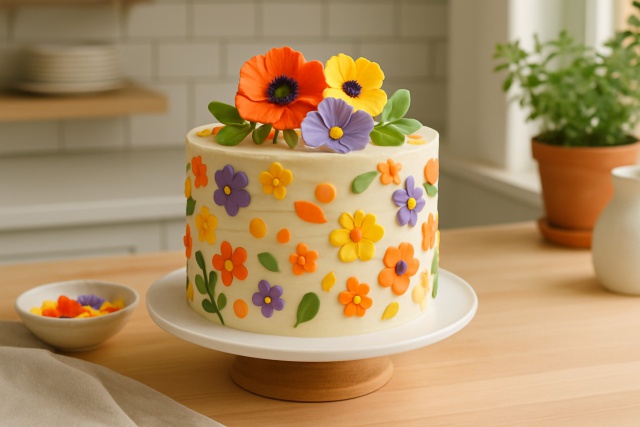
An assortment of beautifully decorated fancy cookies showcasing various decorating styles.
Key Ingredients and Tools You will Definitely Want on Hand
Item Category
Item
Notes
Ingredients
All-purpose flour
Builds a sturdy base that’s soft and tender inside
Unsalted butter
Brings a lovely richness and depth to the flavor
Granulated sugar
Sweetens things just right, never overpowering
Eggs
Binds the dough together and gives great texture
Vanilla extract
Adds that classic, comforting flavor boost
Royal icing sugar (powdered sugar)
Essential for silky-smooth, easy-to-work icing
Meringue powder
Keeps royal icing stable so it behaves as it should
Food coloring (gel-based)
Delivers bright, lasting colors that don’t run
Tools
Piping bags
Lets you take control for neat, precise icing lines
Piping tips (various sizes)
Gives you a toolkit of line widths and pretty details
Cookie cutters
Makes sure every cookie is perfectly shaped
Edible markers
Great for quick outlines or those little decorative flourishes
Airbrush kit (optional)
Perfect for smooth gradients and polished finishing touches
Silicone baking mats
Stops cookies from sticking and helps them bake evenly
Offset spatula or scraper
A real helper when smoothing icing nice and even
Using high-quality ingredients like fresh butter and pure vanilla truly makes a noticeable difference in flavor From what I have seen, beginners often do just fine with affordable decorating tools grabbed from online shops or craft stores
A Practical Guide to Crafting Elegant Decorated Cookies That Really Impress
1
Start by creaming softened butter with sugar until it’s light and fluffy. Then add the eggs and a splash of vanilla. Slowly mix in sifted flour and work it gently until you have a smooth workable dough that’s just right.
2
Pop the dough in the fridge for at least an hour. This chill time helps stop the cookies from spreading and makes rolling the dough easier.
3
On a floured surface, roll the dough out to about 1/4 inch thick. Then have some fun cutting out shapes with your favorite cookie cutters. Go wild no judgment here.
4
Bake the cookies on parchment or silicone-lined trays at 350°F (175°C) for 8 to 12 minutes. Keep an eye on the edges staying pale because that’s the secret to keeping them tender instead of overbaked.
5
Let the cookies cool completely on wire racks before you even think about decorating. Frosting will turn into a melty mess otherwise.
6
Whip up royal icing by stirring powdered sugar meringue powder and water together. Adjust the thickness — use thicker icing for piping delicate outlines and thinner for flooding the cookie base smoothly.
7
Grab your piping bags fitted with small round tips to outline and flood the cookies like a pro. Then add some personality with wet-on-wet techniques or dry brush strokes for those charming details.
8
Finally, let your masterpieces dry uncovered for at least 8 hours or overnight. Once ready tuck them away in airtight containers to keep that delightful crispness intact.
Common problems include cracked icing. This usually happens when the icing is too thick or dries too quickly, kind of like when you try to rush a good thing. To fix this, adjust the consistency a bit and try to work in moderate humidity. Soft cookies often appear when the baking time is off or the dough is rolled unevenly. So take extra care to roll the dough evenly and watch the baking time closely. Color bleeding occurs when wet colors mix together. Letting each layer dry completely before applying the next or gently using a toothpick to separate wet areas can really help and keep the edges looking sharp.
Visual guide illustrating the key steps in making fancy decorated cookies.
Inspiring Design Ideas to Jazz Up Your Parties and Gifts
Whip up cookies that shout the season or holiday—think snowflakes for a cozy winter vibe or pumpkins that scream Halloween charm.
Add a personal touch with heartfelt messages or fancy monograms using edible markers or piped icing.
Give your cookies that little je ne sais quoi by sprinkling edible glitter, luster dust or a touch of gold leaf for a subtle sparkle that catches the eye.
Bring cookies to life with colorful sprinkles, sugar pearls or tiny fondant shapes that add just the right amount of texture and flair.
Wrap each cookie in clear cellophane tied with ribbons because a little presentation goes a long way when giving a gift.
Coordinate cookie colors and designs to match party themes or the unique tastes of those lucky enough to receive them.
Arrange cookie sets in gift boxes lined with decorative tissue or inserts for a polished, neat finish that shows someone really cared.
Customizing elegantly decorated cookies is a fantastic way to add a special touch to any celebration. By choosing colors and designs that match the party theme or highlight the recipient’s favorite things, you’re not just making treats—you’re crafting thoughtful edible gifts with these fancy decorated cookies.
Helpful Tips and Best Practices for Actually Nailing Success
Keep your workspace and tools clean and tidy to help the icing slide on smoothly like butter and prevent any unwanted mess or contamination.
Plan your decorating steps ahead of time so you can make the most of drying periods and avoid smudges. Trust me, this saves a lot of frustration.
Practice your piping on parchment paper before decorating the cookies. This is a great way to build confidence and steady your hands.
Adjust your icing thickness and techniques depending on the climate because humid days often require firmer icing. Think of it as adapting your approach to the weather.
Store and transport your beautifully decorated cookies in airtight containers. Layer and pad them carefully to protect the designs from any bumps on the way.
When working on larger batches for parties or a small business, increase your cookie projects gradually to keep the quality consistent and appealing.
"Cookie decorating is one of those fun crafts where a little practice can transform plain old treats into stunning edible art. It’s a sweet way to spark creativity and bring a bit of joy with every delightful creation."
Frequently Asked Questions
What is the difference between piping and flooding consistency for royal icing?
Piping consistency is fairly thick like toothpaste and ideal for crisp outlines and tiny details that hold their shape well. Flooding consistency is much thinner, similar to syrup, and is used to fill in outlined areas smoothly without lumps. If your piping icing feels too stiff, add a few drops of water at a time until it loosens to the perfect flowing consistency. Easy peasy.
How can I prevent my cookie icing from cracking after it dries?
Icing tends to crack when it is too thick or dries too quickly. To avoid cracks, make sure your flooding icing is thin enough to spread evenly—aim for the classic 10-second consistency which usually works well. Also, avoid drying your cookies in very hot or windy places. A slower, gentler drying process with moderate humidity helps the icing set nicely without cracking.
Do I need expensive, professional tools to start decorating cookies?
Absolutely not. A simple budget-friendly kit with a few piping bags, small round tips like #2 or #3 and some food coloring gels will get you started easily. You can find these at craft stores or online, no fancy boutiques needed. Good quality ingredients like fresh butter and pure vanilla often make a bigger difference in flavor than any high-end tools could.
How long does it take for decorated cookies to dry completely?
Royal icing usually takes at least 8 hours to harden completely but leaving them uncovered overnight is the safest approach. This gives the icing enough time to set fully and prevents your design from smudging when packing. If it is humid where you are, drying might take longer so plan accordingly.
My cookies spread and lost their shape while baking. How can I fix this?
This usually means the dough didn’t get cold enough before baking. Make sure to chill your rolled-out dough in the fridge for at least an hour before cutting and baking. That cold rest really makes a difference. Also, use a recipe with the right flour-to-butter ratio and ensure your oven is properly preheated to help your cookies keep sharp defined edges.
What is the best way to store decorated cookies to keep them fresh?
Once your icing is fully dry, store your cookies in a single layer inside an airtight container at room temperature. If you need to stack them, place some parchment paper between the layers. They will stay fresh and crisp for about one to two weeks. Avoid the fridge since it tends to soften cookies and nobody wants soggy treats.
Passionate by sustainable living, this environmental journalist bridges the gap between complex ecological research and practical everyday solutions for modern households.