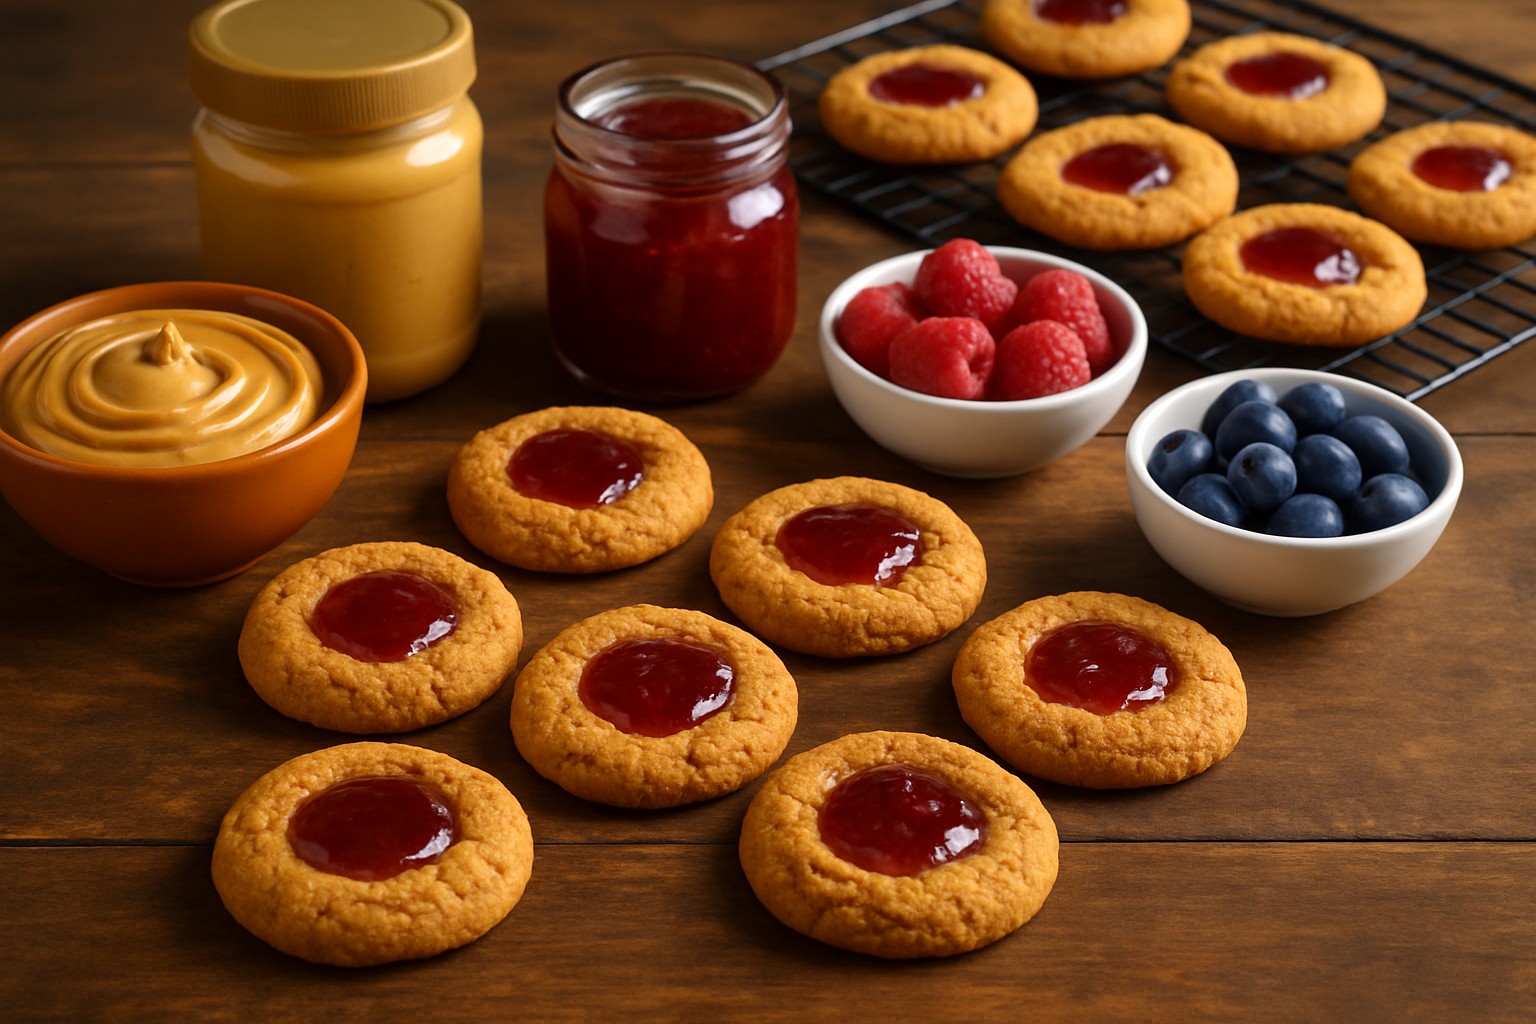
Peanut butter and jelly cookies capture the nostalgic charm of that classic sandwich in every bite. They mix the creamy nutty goodness of peanut butter with a sweet fruity pop of jelly that’s hard to resist.
Ingredients You’ll Need for Those Classic Peanut Butter and Jelly Cookies
The secret to truly stellar peanut butter and jelly cookies boils down to choosing the right ingredients. Creamy peanut butter brings irresistible smoothness while natural high-quality jams or jellies add a fresh just-picked fruit flavor that really sings. The type of flour and sweeteners you pick often makes or breaks the cookie's soft and chewy vibe.
Ingredient
Quantity
Role in the recipe
Possible substitutions
Tips for selection
All-purpose flour
1 1/4 cups
Gives the dough its structure and that perfect chew we all crave
Gluten-free flour blend
Always go for fresh, sifted flour to keep things light and even-textured—trust me, it makes a difference.
Baking soda
1/2 teaspoon
Helps the dough puff up just a bit, no one likes flat cookies
Baking powder (1 tsp)
Measure with care here; too much and your cookies might turn into little soufflés, too little and they’ll stay dense.
Salt
1/4 teaspoon
Punches up the flavor, subtly tying everything together
Sea salt, kosher salt
Fine salt works best so it dissolves smoothly—no crunchy surprises mid-bite.
Creamy peanut butter
1/2 cup
The star player, bringing moisture and that unmistakable peanut flavor
Crunchy peanut butter
Natural peanut butter adds depth but watch out, it can get a bit oily—kind of like that one friend who’s always carrying snacks.
Unsalted butter
1/2 cup (softened)
Adds richness and makes your cookies melt-in-your-mouth tender
Salted butter (reduce salt in recipe)
Make sure your butter’s soft, not melted. Room temp butter helps everything blend like a dream.
Granulated sugar
1/2 cup
Sweetens the dough and adds just the right crunch to the texture
Coconut sugar, cane sugar
Stay away from powdered sugar here—it’ll mess with your cookie’s signature bite.
Brown sugar
1/2 cup packed
Locks in moisture and gives a warm, caramel vibe
Light or dark brown sugar
Dark brown sugar brings more oomph to flavor and keeps things extra soft—definitely my go-to.
Egg
1 large
Holds everything together like a culinary glue
Flax or chia egg (vegan)
Using large eggs sticks the landing in terms of moisture and binding.
Vanilla extract
1 teaspoon
Gives a subtle kick, rounding out the flavors
Almond extract
If you can, spring for the real deal instead of imitation—it’s a night and day kind of difference.
Jelly or jam
1/3 cup
Delivers a fruity surprise right in the cookie's center
Homemade preserves, marmalade
Go for jellies that hold their shape well—otherwise you might end up with a spreading mess.
Equipment and Preparation Tips You’ll Want to Keep in Mind Before Baking
Getting your tools ready and doing a bit of prep work before baking can really make a difference in keeping your dough consistent and ensuring it bakes evenly. Preheating the oven sets the stage by bringing it up to the right temperature right from the get-go.
A trusty set of mixing bowls in various sizes perfect for handling wet and dry ingredients without a fuss
Measuring cups and spoons to ensure you’re spot on with your ingredient amounts—no guesswork here
A baking sheet lined with parchment paper or a silicone mat to keep things from sticking and make cleanup easy
A cooling rack that lets your cookies cool evenly and avoids that disappointing soggy bottom
A spoon or cookie scoop to portion uniform dough balls and jelly centers because consistency is key
How to Make Peanut Butter and Jelly Cookies, Step by Step (Because Sometimes You Just Need a Sweet Fix)
Follow these simple steps to whip up perfectly balanced peanut butter and jelly cookies. Start by mixing the dry ingredients and finish by spooning in the fruity jelly centers. This method ensures every bite is soft and warm with a delightful jam surprise.
1
Whisk together the flour, baking soda and salt in a medium bowl. Set this aside for now and don’t rush it.
2
Beat the softened peanut butter, butter and sugars in a large bowl until the mixture is silky smooth and creamy.
3
Add the egg and vanilla extract to the peanut butter mixture and mix until everything is fully blended and looks just right.
4
Slowly fold the dry ingredients into the wet ones, stirring gently until they just come together. Be careful not to overmix because we want tender cookies, not hockey pucks.
5
Cover the dough and put it in the fridge for at least 30 minutes so it firms up nicely. Patience pays off here.
6
Preheat your oven to 350°F (175°C) and line your baking sheets with parchment paper because it makes cleanup a breeze.
7
Drop tablespoon-sized dough balls onto the prepared sheets. Give each a gentle press to create a small well in the center and then fill it with about half a teaspoon of your favorite jelly.
8
Bake for 10 to 12 minutes until the edges turn a lovely light golden color while the centers stay soft and chewy—that's perfect bite territory.
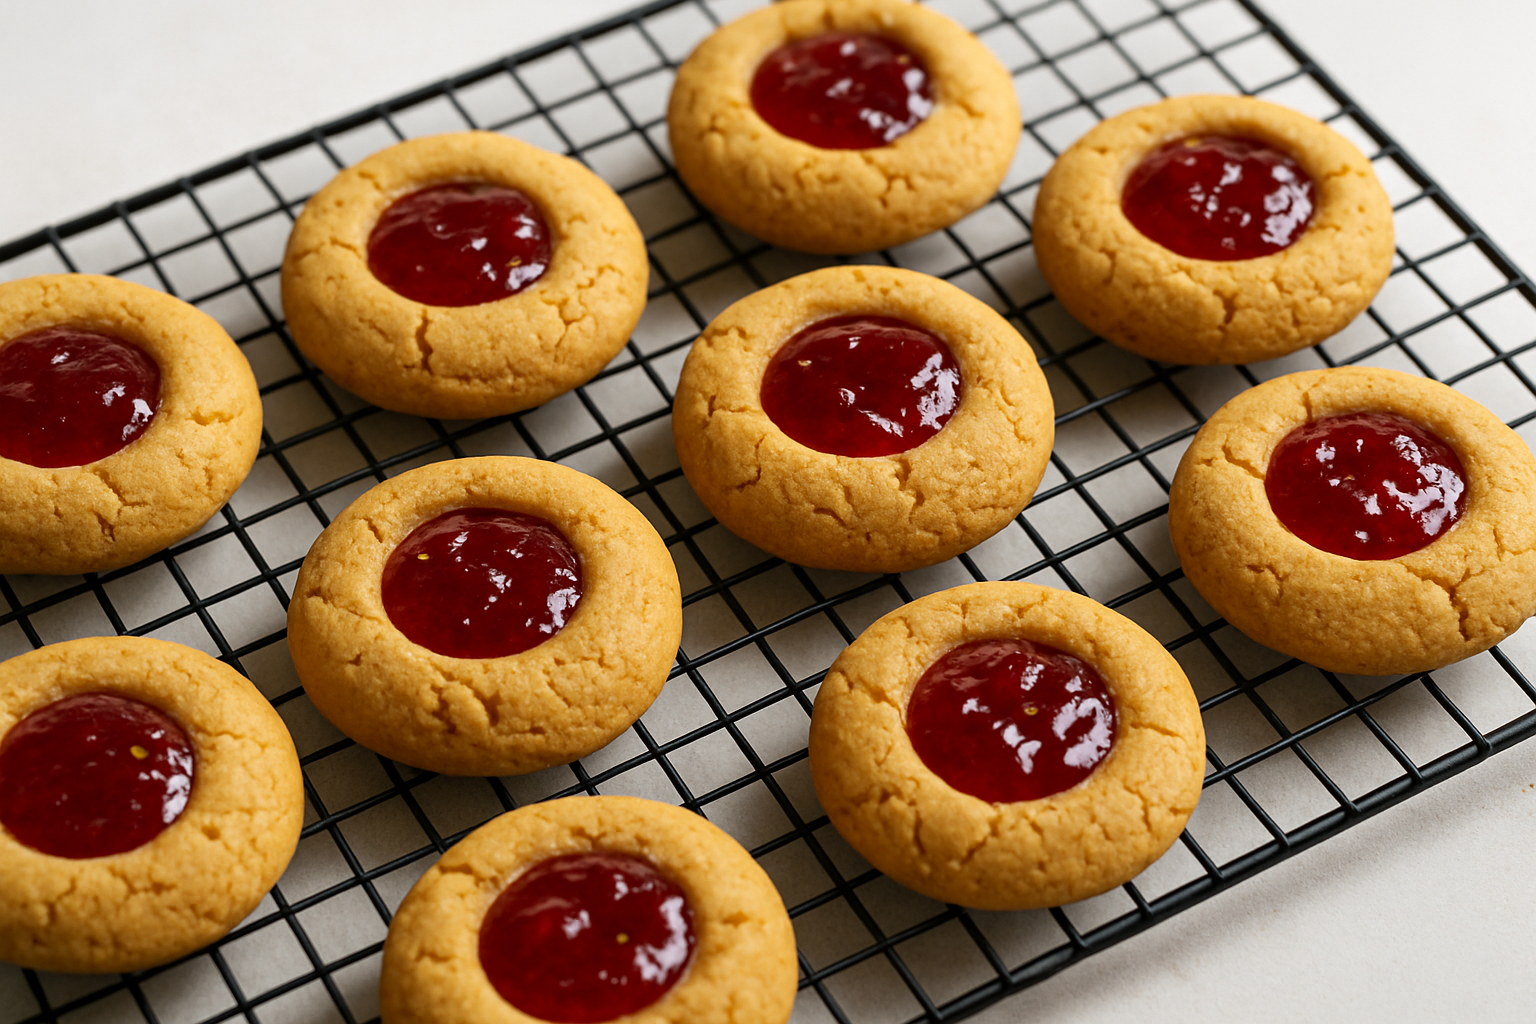
9
Let the cookies rest on the baking sheet for 5 minutes before transferring them to a wire rack to cool completely—if you can resist eating them right away!
Freshly baked peanut butter and jelly cookies cooling on a rack, showcasing the golden texture and vibrant jelly centers.
Your cookies are usually ready when the edges take on a lovely golden brown hue and the centers feel firm but still have that slight soft give when you press them gently. Keep an eye on them though because overbaking can sneakily dry them out and underbaking might leave you with cookies that flop right off the tray. Chilling the dough is a game changer since it helps keep those cookies from spreading like they’re on a mission to take over the pan.
Different Ways to Customize and Improve Your Cookies (Because Life’s Too Short for Boring Treats)
This recipe is a fantastic jumping-off point for kitchen creativity. Swap out the peanut butter—crunchy gives you a satisfying snap and texture while natural offers a purer peanut flavor. Mixing in different jams like raspberry or blueberry really shakes things up with fresh fruity vibes. Tossing in extras like chocolate chips or chopped nuts turns it into a treat if you’re feeling indulgent.
Go for crunchy peanut butter if you want to savor the delightful nutty bits in every bite
Mix things up by swapping grape jelly for raspberry, strawberry or apricot jam to add a lovely pop of fresh fruity flavor
Toss in chocolate chips or chopped nuts to amp up richness and keep your taste buds guessing with texture
For vegan or allergy-friendly treats, use gluten-free flour blends with plant-based butter and egg substitutes. Trust me, it’s easier than it sounds and just as tasty
Storage Tips, Serving Ideas, and Just How Long It Really Lasts
Storing your peanut butter and jelly cookies the right way is key to keeping them fresh and tasty for several days—no one wants a stale disappointment. Pop them in an airtight container at room temperature or freeze them to stash for longer. These cookies pair wonderfully with a glass of milk, a cup of coffee or tea, each bringing out cozy, comforting flavors in its own special way.
Keep your cookies fresh by storing them in an airtight container at room temperature—good for up to 5 days if you can resist digging in sooner
Pop your baked cookies in a single layer on a baking sheet in the freezer first, then transfer them to freezer bags. They’ll keep their charm for up to 3 months
They’re just as delightful warm or at room temperature, especially with a cold glass of milk or a cup of coffee or a soothing herbal tea on the side
These treats are absolute winners for casual snacking, spontaneous picnics, school lunches or your classic holiday cookie platters
Frequently Asked Questions
Can I use natural peanut butter in this recipe?
You can definitely go ahead and use natural peanut butter but heads up—it tends to be a bit oilier which might make the dough greasier and change how much the cookies spread out in the oven. Give it a good stir before mixing it in to avoid surprises. Also, chilling the dough is extra important with natural peanut butter to help it firm up nicely and keep things in check.
Why is it important to chill the dough before baking?
Chilling the dough for at least 30 minutes really pays off. It helps the fats solidify so the cookies don’t spread too thin and end up flat as a pancake. Plus, this little timeout gives the flavors a chance to mingle and settle. The result is a thicker, chewier cookie packed with richer taste.
My jelly always bubbles over. How can I prevent this?
Jelly bubbling over can be pesky. The trick is not to overfill those little indentations—a level half teaspoon usually does the job just right. Make sure your thumbprint is deep enough to hold the jam like a cozy little nest. Also, opting for a thicker jam instead of runnier jelly makes a big difference in keeping everything neat and tidy during baking.
Can I make these cookies gluten-free or vegan?
Absolutely. For gluten-free, simply swap out the all-purpose flour for the same amount of gluten-free baking blend. If you’re going vegan, swap in plant-based butter, use a flax egg (1 tablespoon ground flaxseed mixed with 3 tablespoons water), and double-check that your peanut butter and jelly don’t sneak in any animal products. The rest of the recipe stays the same.
How do I know when the cookies are perfectly baked?
You’ll know they’re ready when the edges look set and have a lovely light golden hue while the centers still seem a bit soft and slightly underdone. They’ll keep finishing as they cool on the warm baking sheet. I’ve found it’s safer to err on the side of underbaking—overbaked cookies tend to dry out and crumble, and nobody wants that.
What is the best way to store these cookies to keep them fresh?
Once your cookies have cooled completely, pop them into an airtight container at room temp; they’ll stay fresh for about five days. If you want to keep them longer, freeze them up to three months. Here’s a tip: lay them out in a single layer on a baking sheet first so they freeze solid without sticking together, then transfer to a freezer bag. That way, you can grab just what you need without a cookie avalanche.
With years covering global economic trends, she translates complex financial concepts into actionable insights for small business owners and individual investors.